Before you start recording, it helps to decide what “Voloco on a PC” should do for you: quick vocal sketches, livestream-ready audio, or a clean signal for a DAW session. For a smooth path, you can install Voloco between a trusted app store, a reputable Android emulator, or a Windows-based Android environment, depending on your workflow.
What You’ll Need Before Installation
- A stable internet connection for downloading app components and updates.
- Headphones to prevent feedback while testing monitoring.
- A microphone (USB or audio interface) with the latest driver installed.
- Enough free storage for an emulator image and cache files.
Tip: If your audio sounds delayed, reduce buffer size in your interface software and disable “enhancements” in system sound settings.
Choose Your Setup Method
In most cases, the simplest approach is to run Voloco inside an Android environment on your desktop, because it provides access to mobile-style permissions and mic routing.
| Method | Best for | Trade-offs |
|---|---|---|
| Android emulator (recommended for most creators) | Creator workflow: install Voloco app on PC through an Android emulator for finer audio routing | Uses extra RAM/CPU, may require tweaking mic permissions |
| Windows Android environment (if available on your system) | Lightweight app running with minimal UI overhead | Compatibility varies by Windows version and hardware |
| Phone + mirroring/capture | Keeping everything on mobile while recording on desktop | More cables/apps, trickier sync and audio routing |
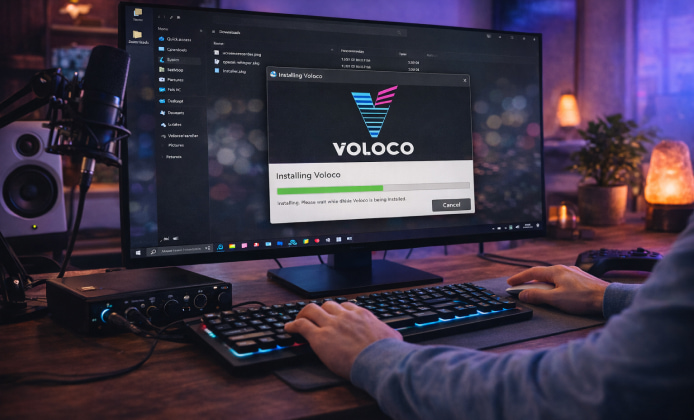
Step-by-Step: Installing via an Android Emulator
Once you pick your emulator, a reliable Voloco download and install on PC routine starts with confirming virtualization is enabled in BIOS/UEFI settings.
- Install your chosen emulator from its official website, then complete the first-launch setup.
- Sign in to the emulator’s app store environment, so you can access official listings and updates.
- Open the store, search for Voloco, and begin the installation inside the virtual device.
- Grant microphone permissions when prompted, then reopen the app to apply changes.
- Connect headphones, select the correct input, and do a short test recording.
To keep the Voloco install process stable, close heavy background apps before recording and prioritize your audio device in system settings.
Microphone and Audio Routing Checklist
- Set your mic as the default input device in Windows sound settings.
- Disable audio “enhancements” if they cause artifacts or pumping.
- Match sample rates between your interface and recording software.
- Use headphones and lower monitoring volume to reduce echo.
Step-by-Step: Installing on Windows (General Guidance)
When you want to install Voloco on Windows, make sure the app environment you use can access your microphone and that Windows privacy settings allow desktop apps to use it.
If you notice the mic input is missing, revisit Privacy & Security settings and toggle microphone access back on, then restart the Android environment.
How to Verify Everything Works
- Record a 10–15 second voice clip to check clarity and volume.
- Switch presets and confirm the effect changes immediately.
- Test playback on both speakers and headphones to spot distortion.
A clean Voloco app install is easiest to confirm when your input meter reacts smoothly and the output stays consistent without sudden spikes.
Issue: The App Opens but Has No Microphone Input
- Re-check permissions inside the Android environment.
- Confirm your mic is not being held by another app (Zoom, Discord, DAW).
- Switch the emulator’s audio input setting from “auto” to your specific device.
Issue: Audio Is Delayed (Latency)
- Lower your interface buffer size and close CPU-heavy apps.
- Try wired headphones instead of Bluetooth while monitoring.
- Reduce emulator graphics settings to free resources for audio.
Issue: Installation Fails or Looks Suspicious
If you encounter an unexpected Voloco installer prompt from a non-store source, treat it as a red flag and return to official distribution channels.
Best Practices for Creators
- Save a “baseline preset” for consistent voice tone across sessions.
- Do a short gain-staging pass before recording long takes.
- Keep one test project dedicated to verifying audio routing quickly.
For streaming, route audio carefully and do a private test broadcast before going live, so your audience never hears clipping or doubled monitoring.
Mini FAQ
- Can I use Voloco with my DAW? Yes, but your results depend on routing, sample rate alignment, and selecting the same mic input everywhere.
- Why does it sound different on playback? Speaker processing, headphone profiles, and system enhancements can change perceived tone, so test on at least two devices.
- What should I do after setup? Once the Voloco app install is complete, create one preset for speech and one for singing, then keep notes on the settings that work best with your mic.
Quick Summary
Use an Android environment on desktop for a stable experience, prioritize permissions and audio settings, and test with a short recording before committing to a full session. If anything feels off, simplify the chain: one mic, one output, one recording app, and then add complexity only after the basics are solid.

 Voloco on PC: Real-Time Vocal Effects and Recording on Computer
 Voloco Install Guide: from First Install to Perfect Vocal Presets
 Voloco on Mac: from Quick Sketches to Professional-Ready Vocals
 Voloco APK: Quick Recording and Low-Latency
 Tips for Optimizing Your Voloco App Experience
 5 Best Apps Similar to Voloco